I used wooden blocks to rest my wrists on for twenty years and they felt comfortable — although they where just built and used without any kind of fine tuning.
While testing some arrangements of the prototype’s keyboard parts, I used different makeshift rests and noticed that not everything is convenient.
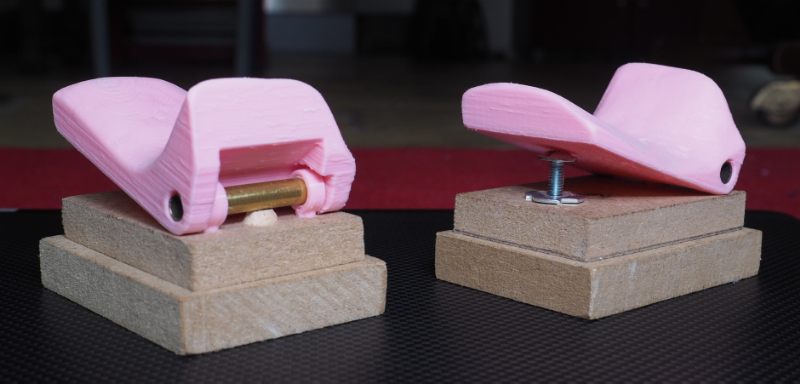
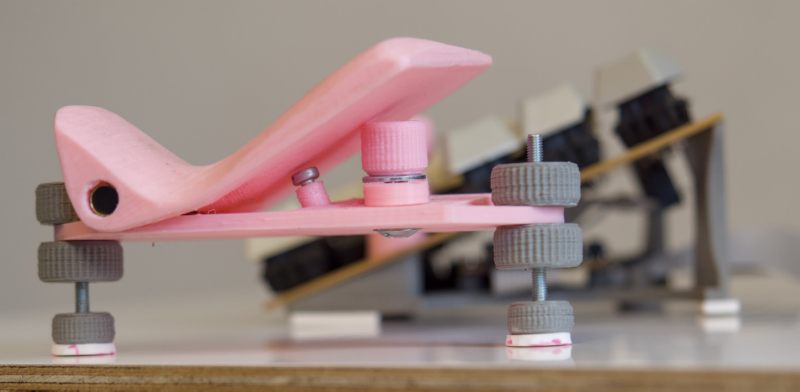
Using modeling clay and one of the wooden rests, a wrist rest was shaped and scanned, and used to create a model to be 3d-printed.
The tenting angle of the resulting rest is adjustable with a screw.
In order to adapt its height to the higher prototype keyboard, a second piece of wood can be stuck to its base with two pegs as joiners. The peg underneath the brass tube contains a nail to fix the tube in place, too.

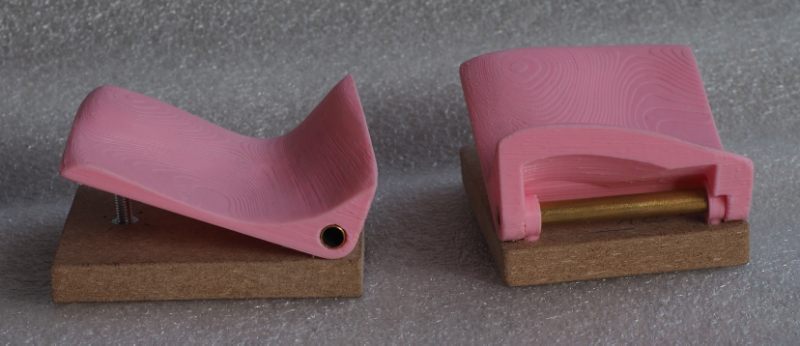
Using this wrist rest with the flat mobile keyboard does not feel good, so I tried a second shape which is a mix of wrist and palm rest.
It feels suitable for a flat keyboard, but also a tented one. Its tenting angle needs to be adjusted accordingly, of course.
Attached
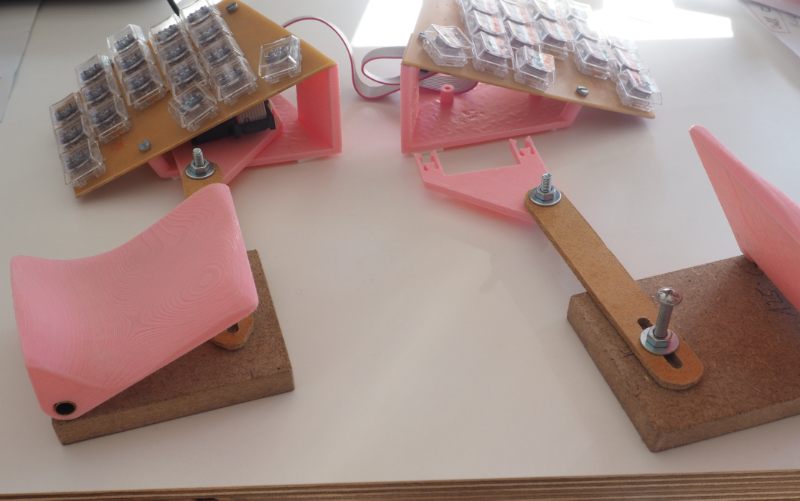
In a second step I wanted to attach those rests to the keyboards to let my hands come back to a relaxed position faster after having moved them or the keyboard away.
I started with the second desktop one and designed it to be easily detachable. The rests clip to the mounting posts which are printed in the right half, too, although there is no PCB. Two screws provide sufficient degrees of freedom:
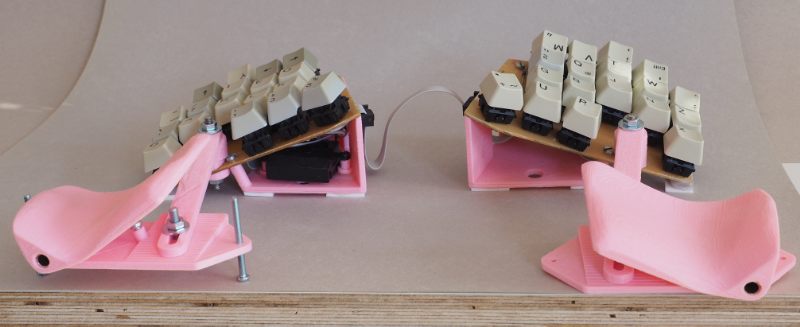
The prototype is about 1cm higher and currently used at a desk with less than optimal dimensions: desk too high, chair not high enough, so I have to raise my hands to the keyboard.
To achieve a more relaxed position the keyboard could be lifted on its back — and lowered on the front at the same time! This required a redesign of the rests to allow them being tilted/lowered towards the table optionally. They need to be attached to the keyboard firmly in order to tilt both parts at the same time. I found a position to connect them but would combine this threaded rod and the nearby screw if I would built another keyboard: leave out the tilted M3, use a M4 rod screwed into the printed base instead which fixes both the PCB and the rest.
The tenting angle of the rest is adjusted by a separate screw in this iteration.
The picture shows two different positions (long M3 screws without soft feet on the left just to show the possibility of adjustment; I don’t use it like this but with the rests fully lowered to the desk as shown with the right half). See there for a more recent picture of both settings.
More pictures of this rest can be seen there.
Downloads
You can download OpenSCAD source files which were used to 3d print those rests. They are licensed under Creative Commons Attribution-NonCommercial-ShareAlike 4.0 International